About these Instructions
This page describes how to install Heck as a Prism Launcher / MultiMC instance using packwiz. You may also get this modpack on Modrinth - their installation instructions differ slightly. However, using instructions found on this page you can set your instance to automatically update when new versions of the modpack are out, or even be on the cutting edge of changes! Manually updating is also more straight-forward.
Prerequisites
Prism Launcher / MultiMC
If you don't have one already, get either Prism Launcher or MultiMC. These are open source third-party launchers that can make it easier to manage multiple Minecraft instances that can each run different versions of the game and have different sets of mods. They're also configurable enough to allow us to hook into packwiz which then makes it possible to download mods from the authors directly, such as from Modrinth and CurseForge, rather than having to redistribute a massive archive with all mods for every single change. Updates are quick, light, and most importantly, easy to create and manage from our end.
If you're unsure which to pick, I would suggest Prism Launcher, as it's in more active development with features (such as easy mod installation) you might find useful if you end up using it for your every-day Minecraft needs.
Java 17+
Unfortunately, neither launcher currently handles installing a Java runtime for you, which is required to play Minecraft. Version 1.18.2 of the game requires Java 17 or above to run. Older versions may require older Java runtimes. This is why it's useful to know where to get them.
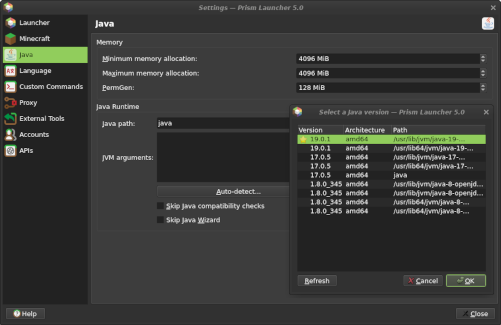
To check which versions of Java are installed, click "Settings" in your launcher, navigate to the "Java" tab and click the "Auto-detect..." button. This will open a popup with all Java versions on your system. If you can already see the right version in this list, you can select it here and this step.
If you want to download Java, I recommend Temurin, an OpenJDK build by the Eclipse Foundation. Once the download is complete, the installation process should be pretty straight-forward. I don't think there's anything in particular I need to point out here.
Modpack Installation
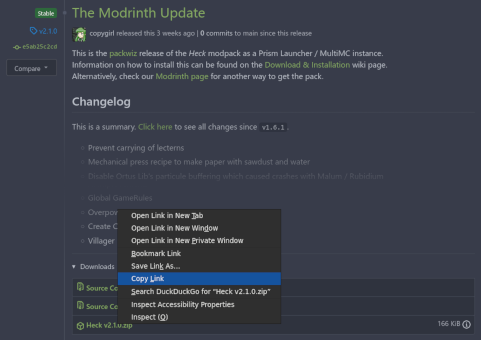
Copy one of these download URLs:
- Heck [main] (auto-updating).zip - Only stable modpack updates.
- Heck [dev] (auto-updating).zip - Potentially unstable, but includes most recent changes.
- On the Releases page, copy the
Heck_vX.X.X.ziplink of the release you want.
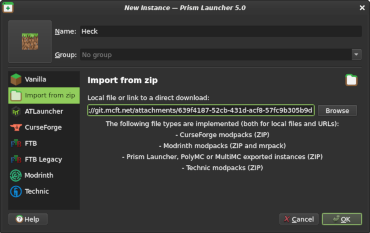
In your launcher, press "Add Instance", select "Import from zip", paste the URL into the textbox and click "OK".
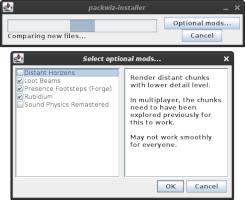
When launching, you will be asked which optional mods you want to use. I suggest to look the mods up online if you're unsure if you want to use them, or ask the community if anything is unclear. If you want to change your mind later, you can always do so when you start up the instance again.
On first launch, packwiz will download all mods, configs and other associated files. And whenever you start the game, it will check for updates and apply them as well. That way you're always on the latest version of the modpack without having to worry about updating it manually. Unless you chose a specific release version, which will only update when you change the version manually - see below.
Updates
When updating the modpack, not all changes might be applied, because some settings are stored per world, which won't be overridden by the update process. If you're just playing multiplayer, this won't matter to you. If you're playing singleplayer however, you might want to copy the contents of the defaultconfigs folder into your world's serverconfig folder after an update.
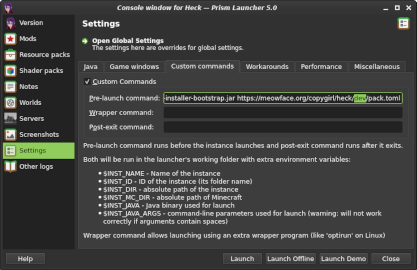
If you want to manually update a packwiz based instance, you can go click "Edit Instance", select "Settings" and "Custom commands". You can simply edit the "Pre-launch command" to point to a different version (or auto-updating branch). For example, change it to:
.../heck/dev/pack.tomlto switch to the unstable development branch..../heck/main/pack.tomlto switch to the stable release branch..../heck/v2.1.0/pack.tomlto switch to thev2.1.0release version.
